Step 1: Create a Droplet on Digital Ocean
Start by logging in to your Digital Ocean account and creating a Droplet for your WordPress site.
- Go to Digital Ocean and log in to your account.
- Click "Create" > "Droplets."
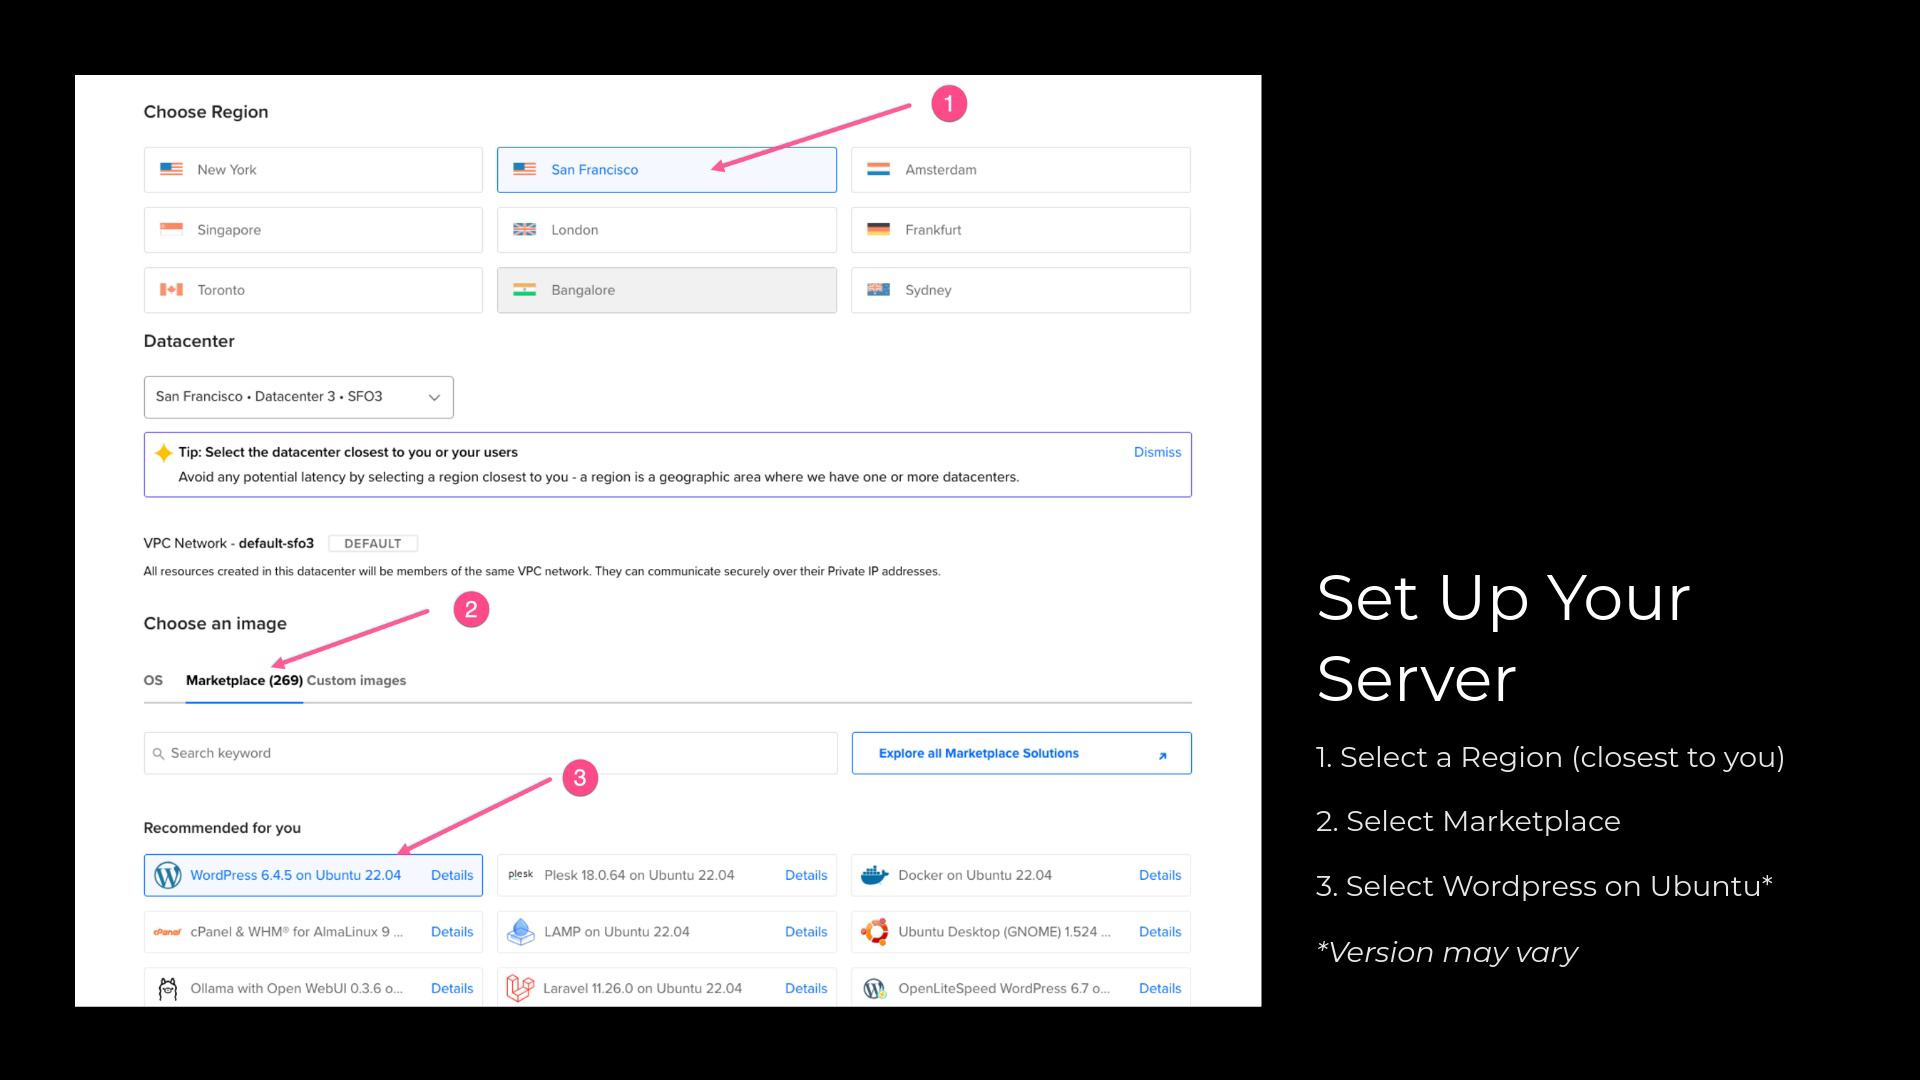
- Select the "WordPress on Ubuntu" image from the Marketplace.
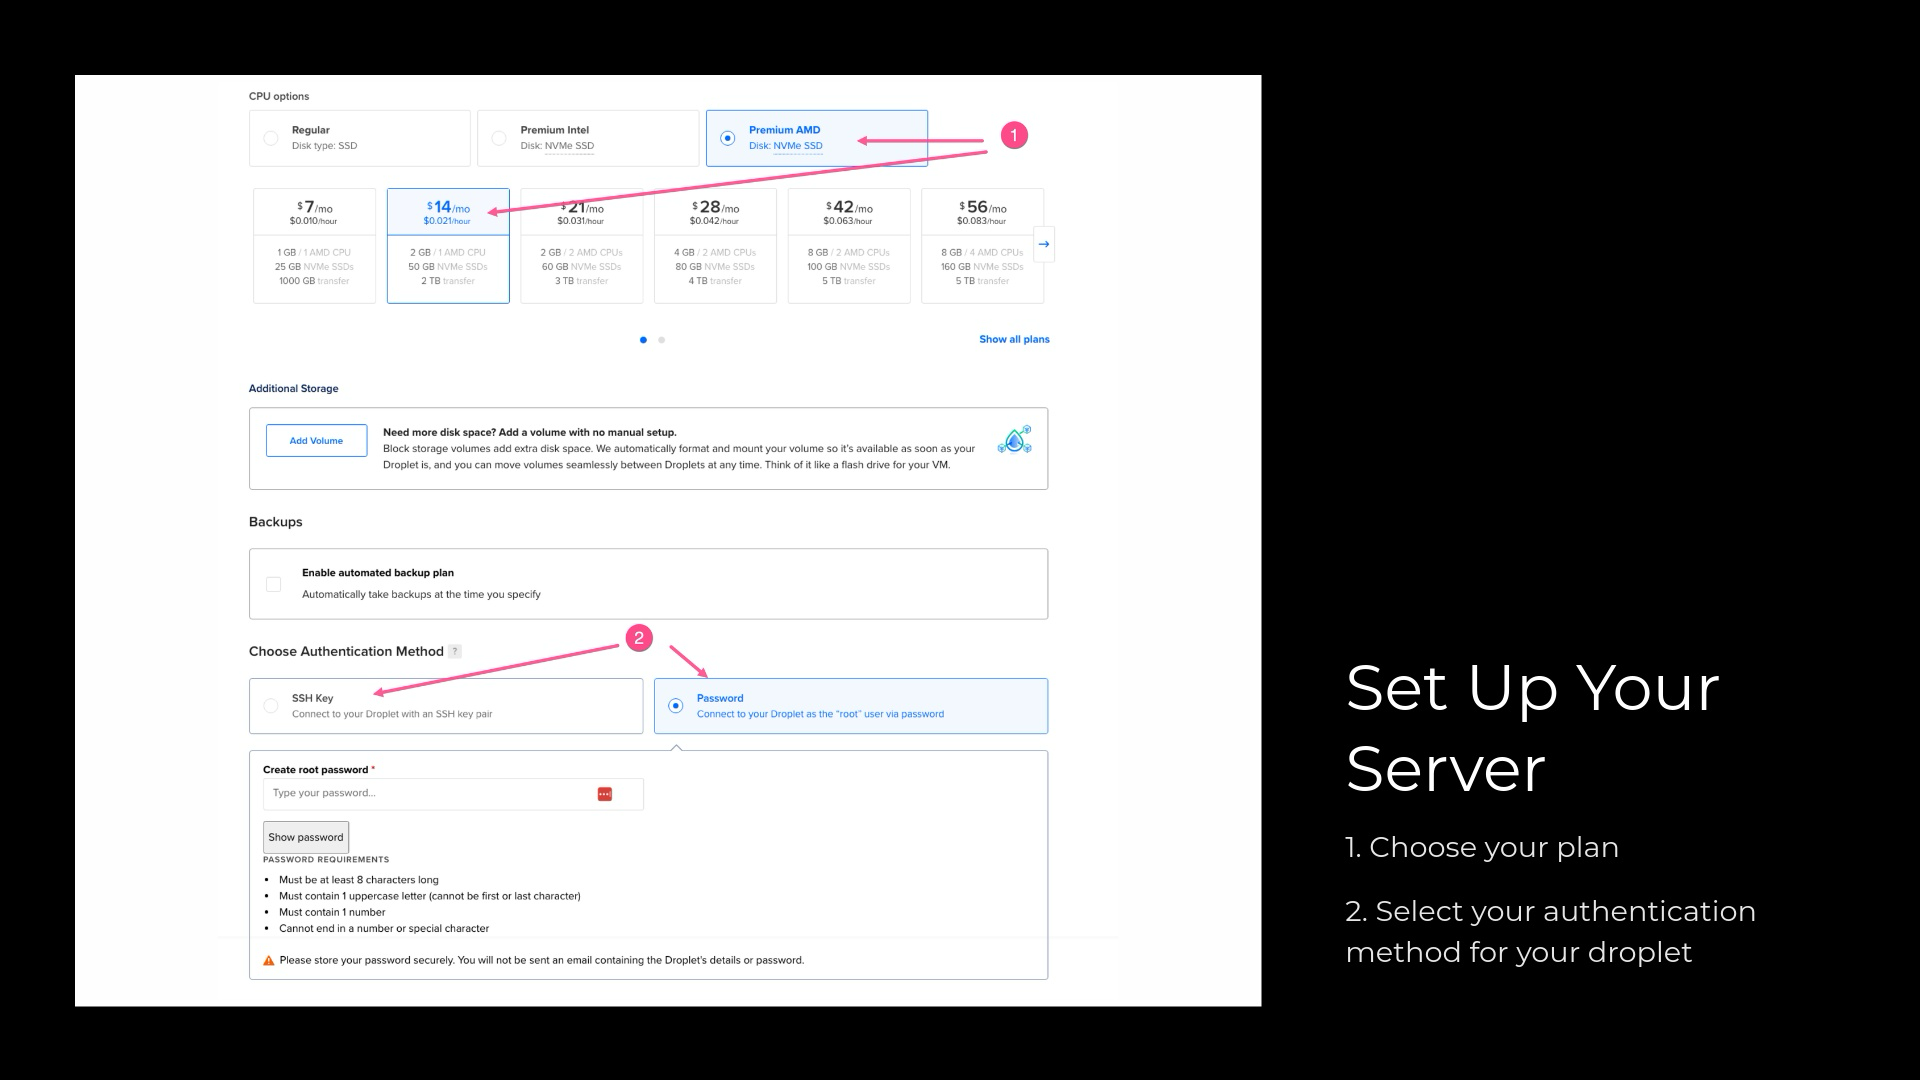
- Choose your desired plan and region (see the screenshot below).
- Choose an authentication method for your Droplet:
- For SSH Key authentication: Upload or generate an SSH key on your local machine.
- For password authentication: Select the "Password" option and create a strong password.
- Click "Create Droplet."
Step 2: Install WordPress
Once your Droplet is created, access it via SSH to complete the WordPress setup.
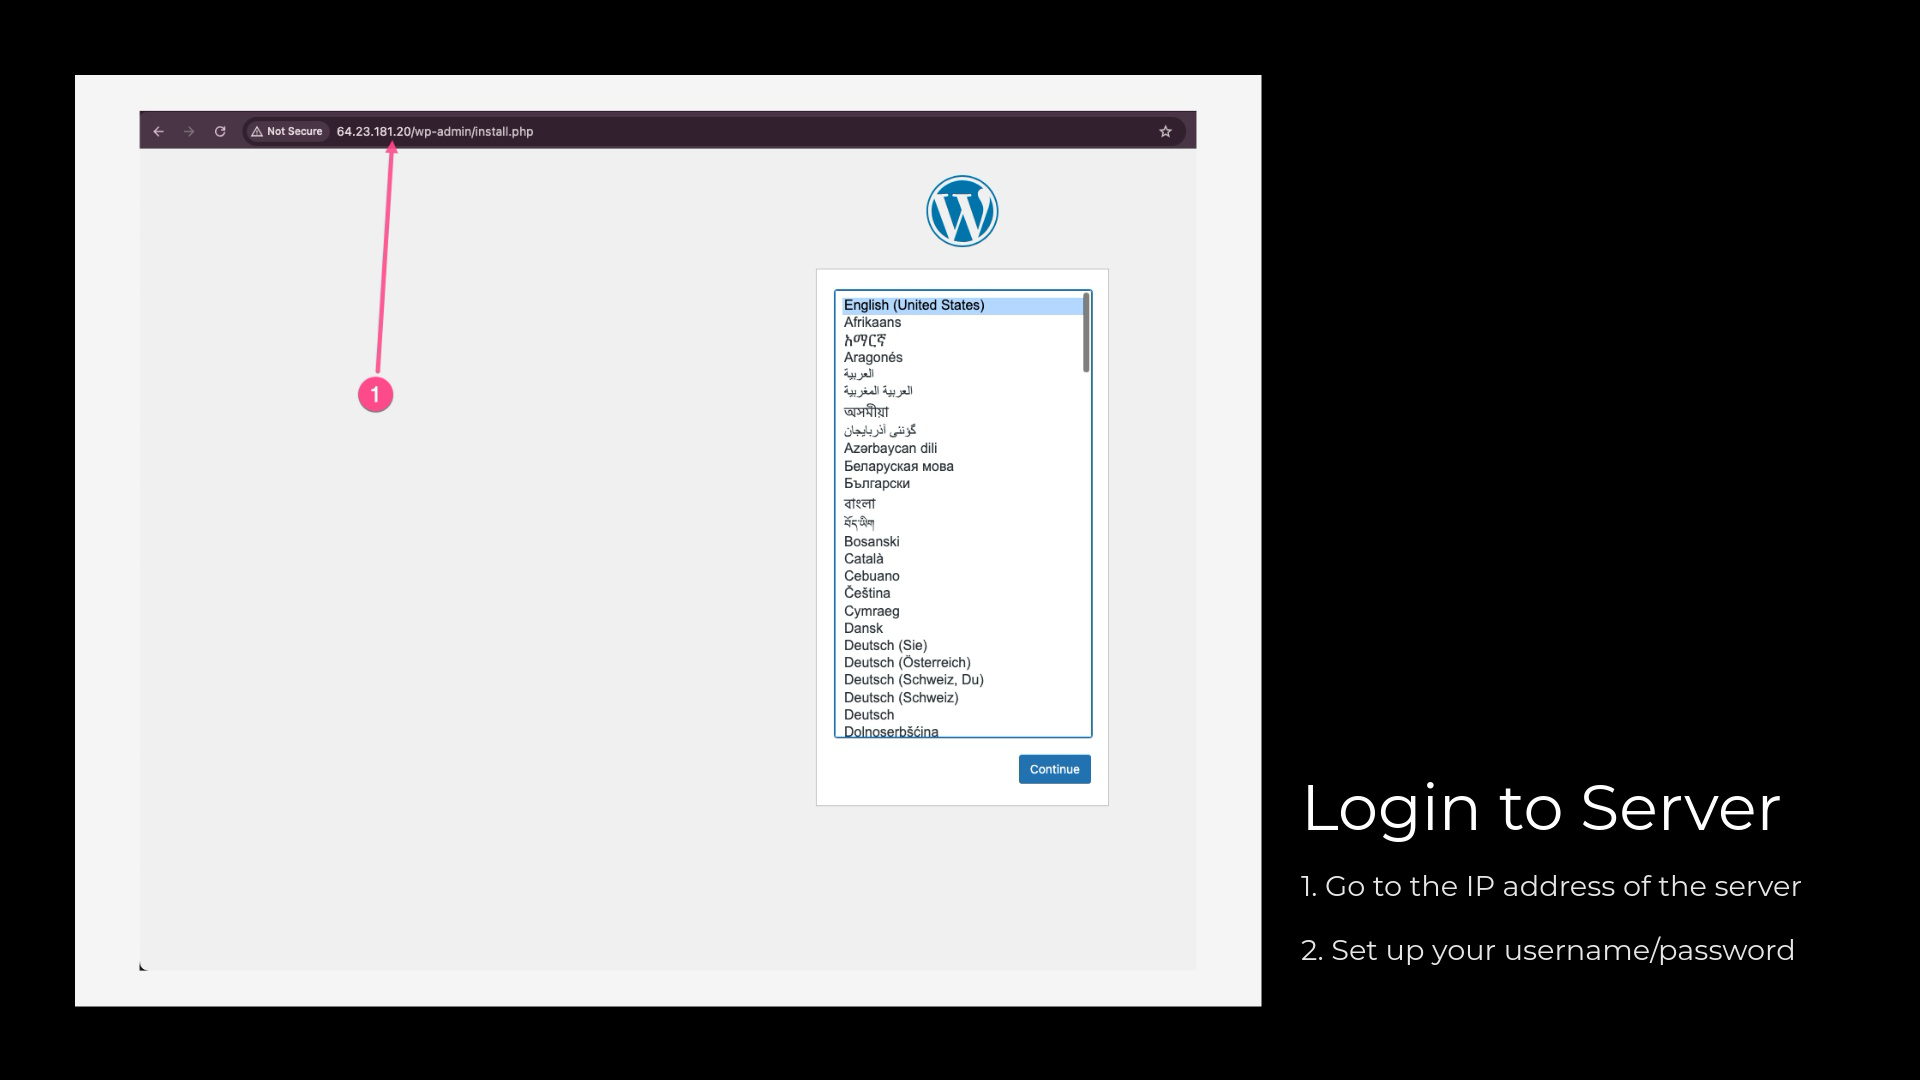
- Note the public IP address assigned to your Droplet.
- Open a browser and navigate to your Droplet's public IP address to set up WordPress. You will see a WordPress installation screen.
- Follow the on-screen prompts to set up WordPress:
- Enter the database details (database name, username, and password).
- Set the WordPress site title, admin username, and password.
- Complete the WordPress installation wizard.
Step 3: Configure a Domain
Link your domain name to your Digital Ocean Droplet.
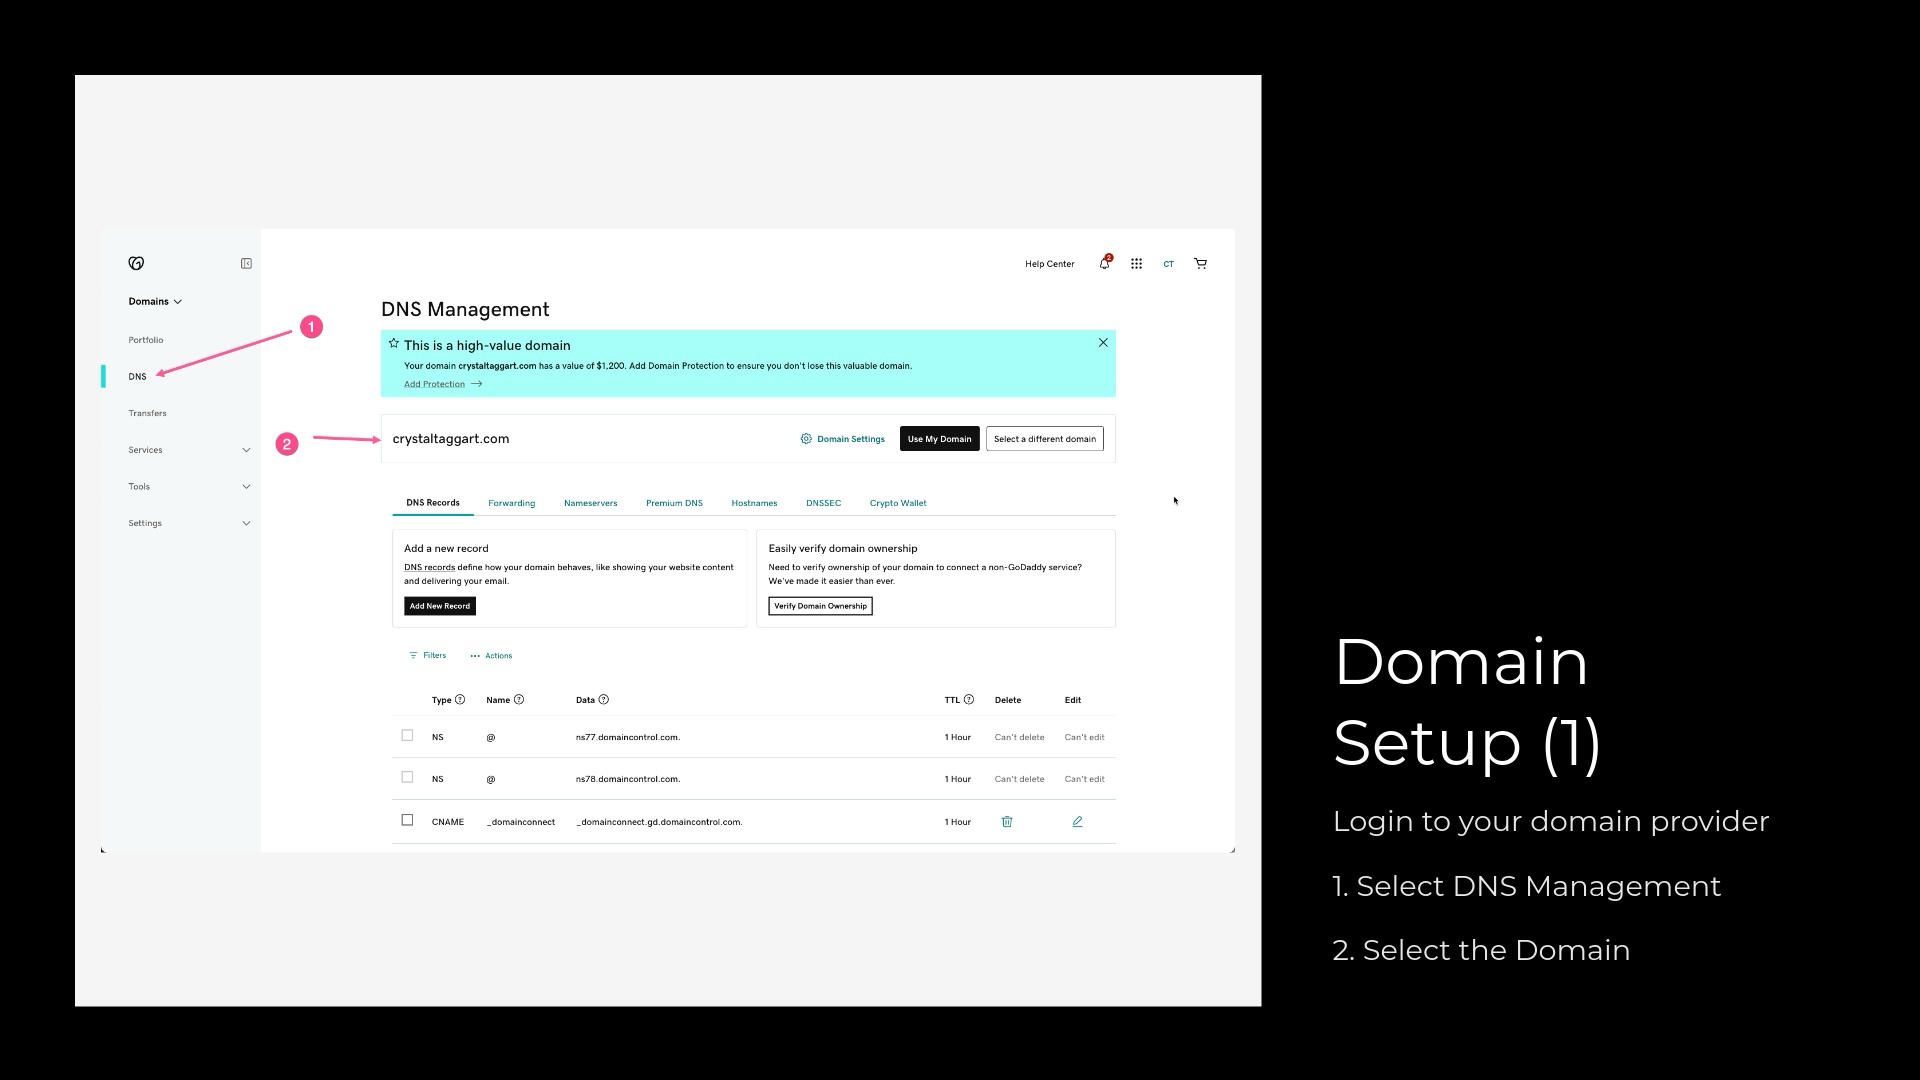
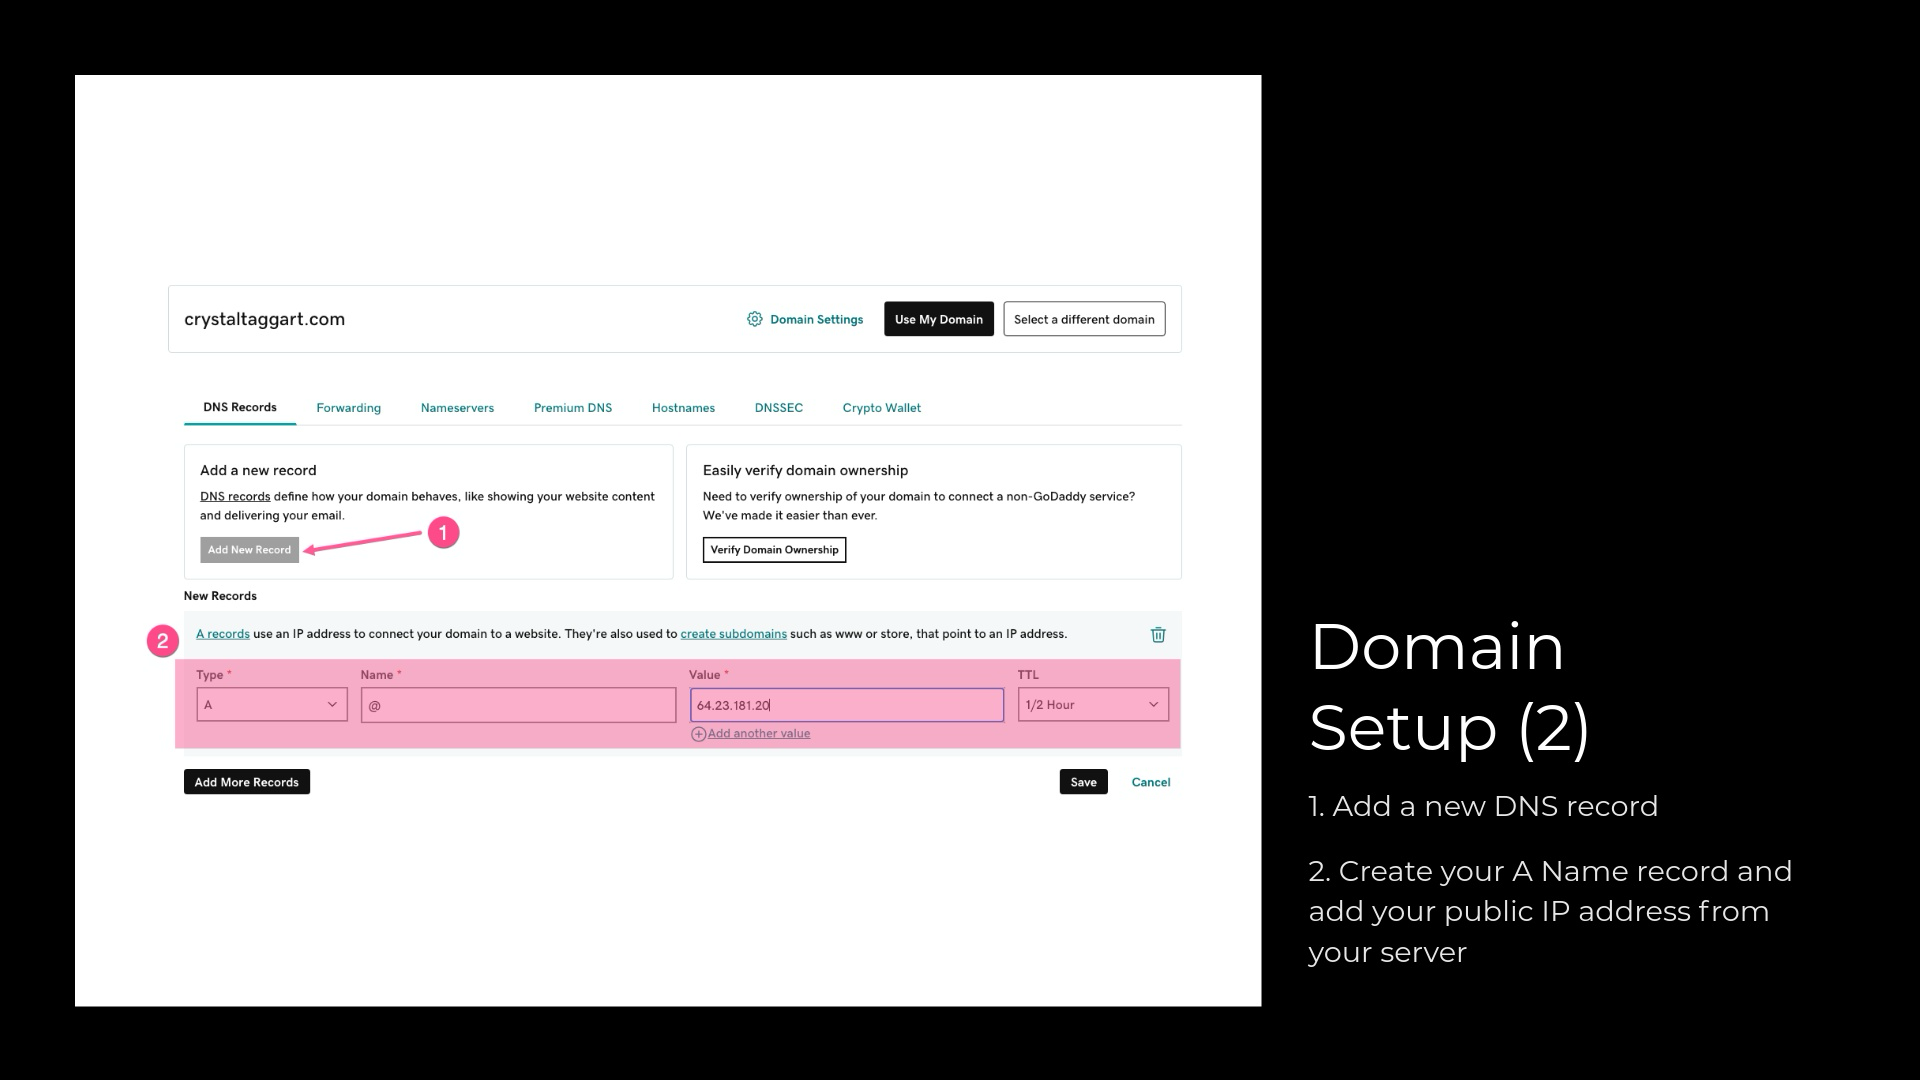
- Log in to your domain registrar and update DNS records:
- For A Record:
- Set Name to
@(this represents your root domain, e.g.,example.com). - Set Type to
A. - Set Value to your Droplet's public IP address.
- Set Name to
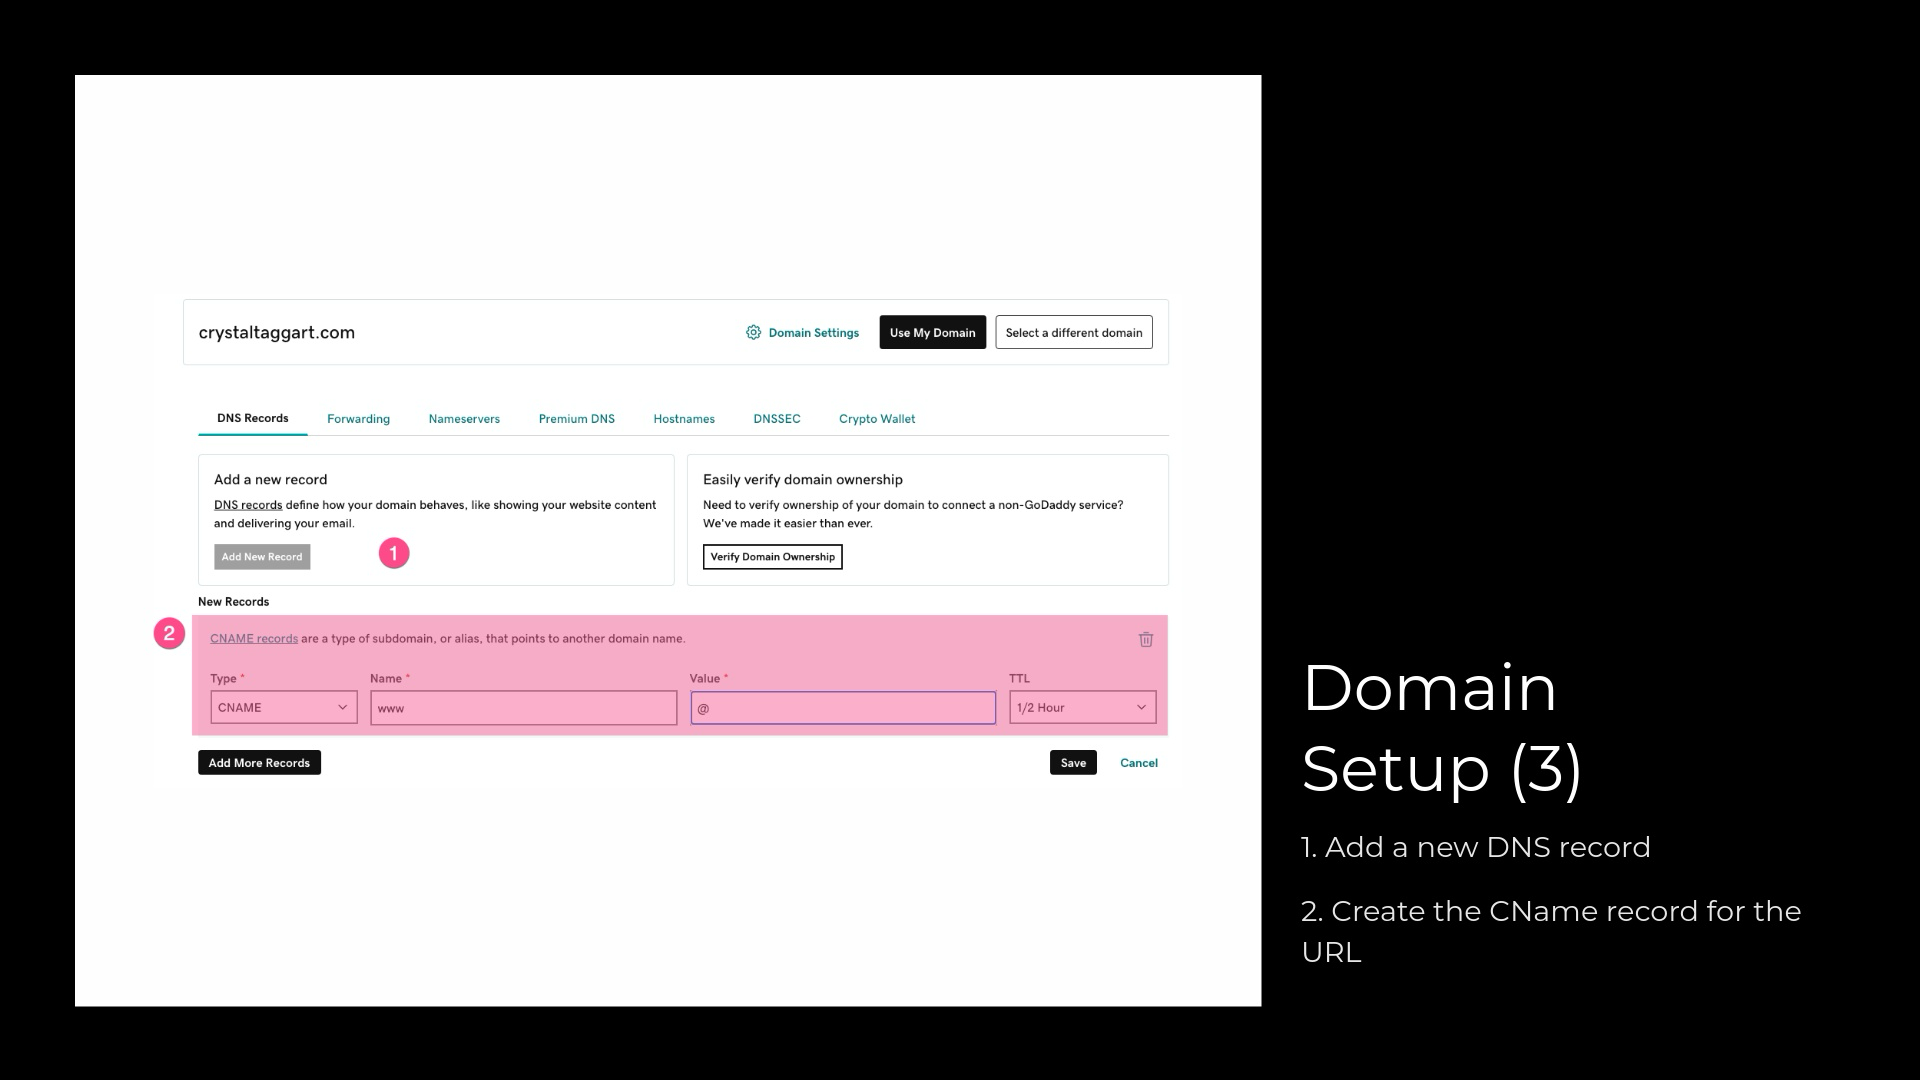
- For CNAME Record:
- Set Name to
www. - Set Type to
CNAME. - Set Value to
@(or your root domain, e.g.,example.com).
- Set Name to
- Test your domain by visiting it in a browser. Note: it can take up to 24-48 hours for the IP address change to be recognized by the internet.
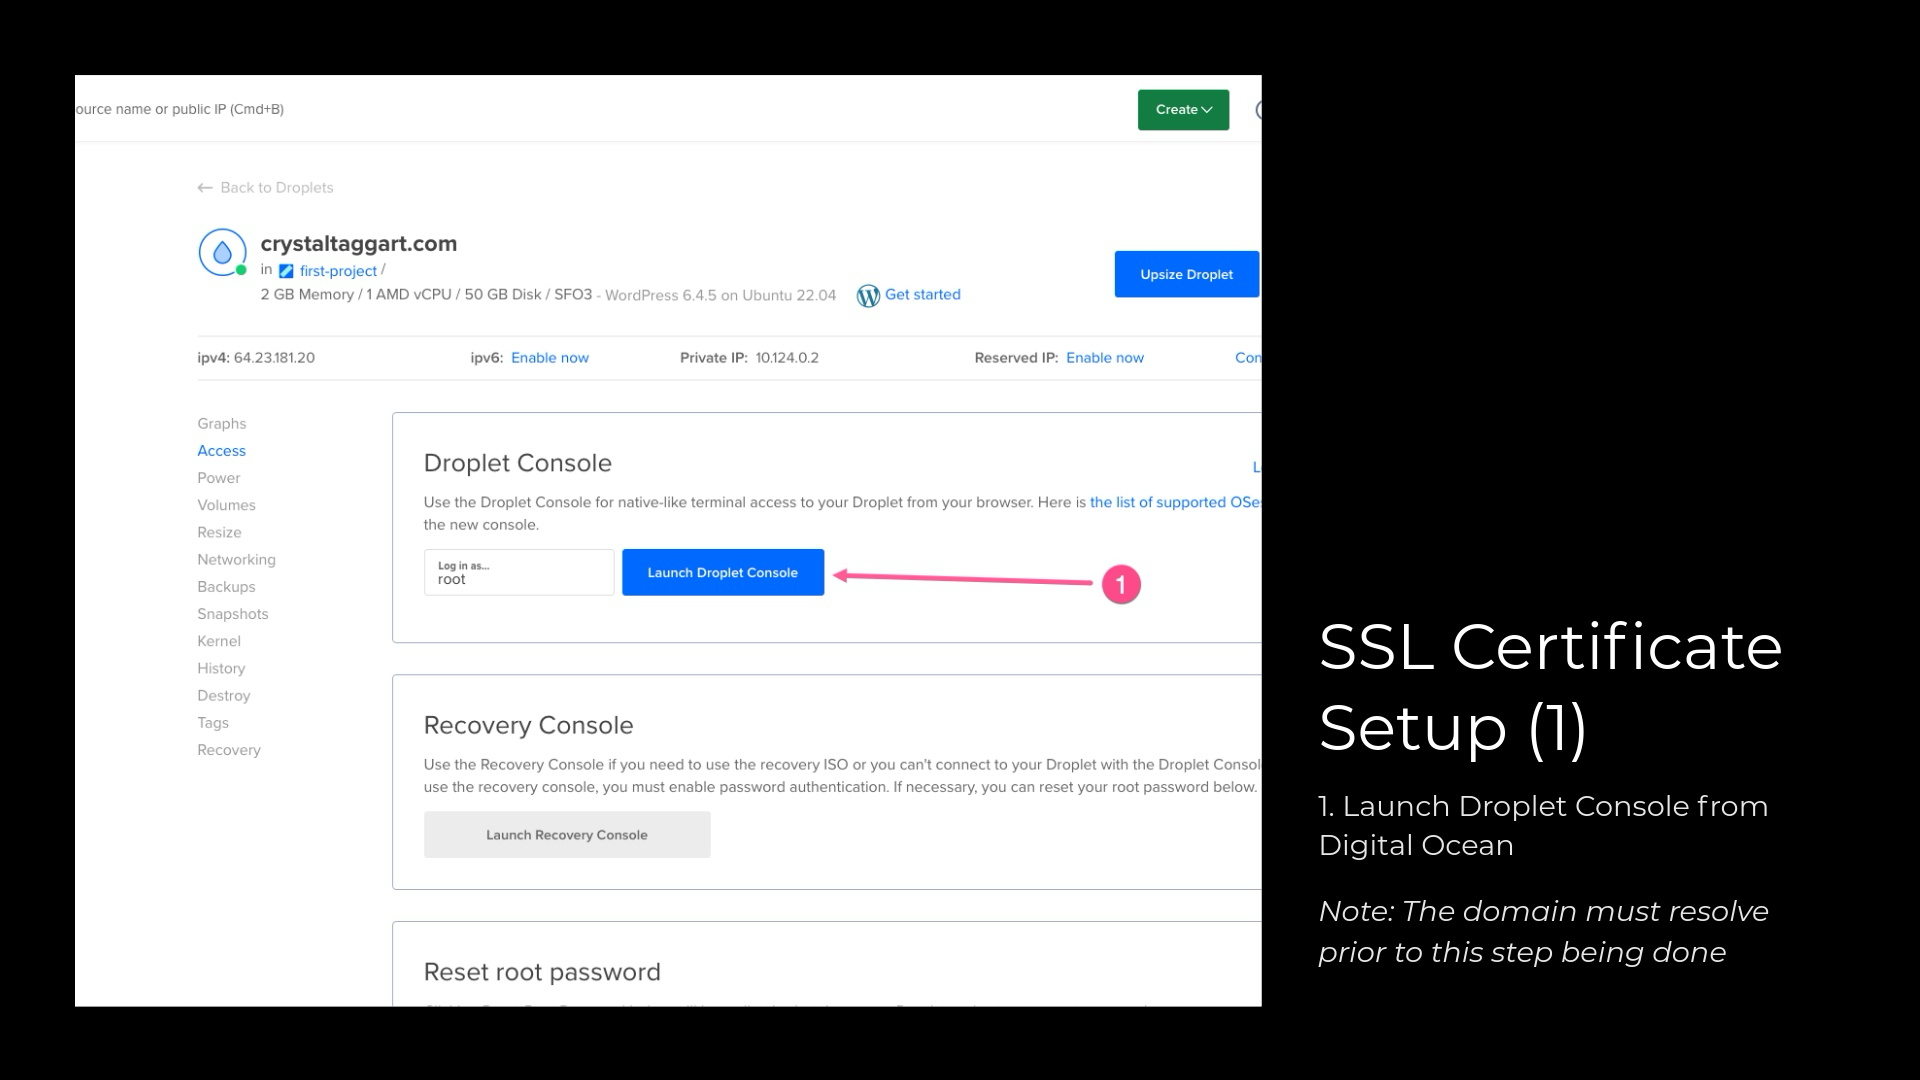
Step 4: Set Up SSL Certificate
Secure your website with an SSL certificate using Certbot.
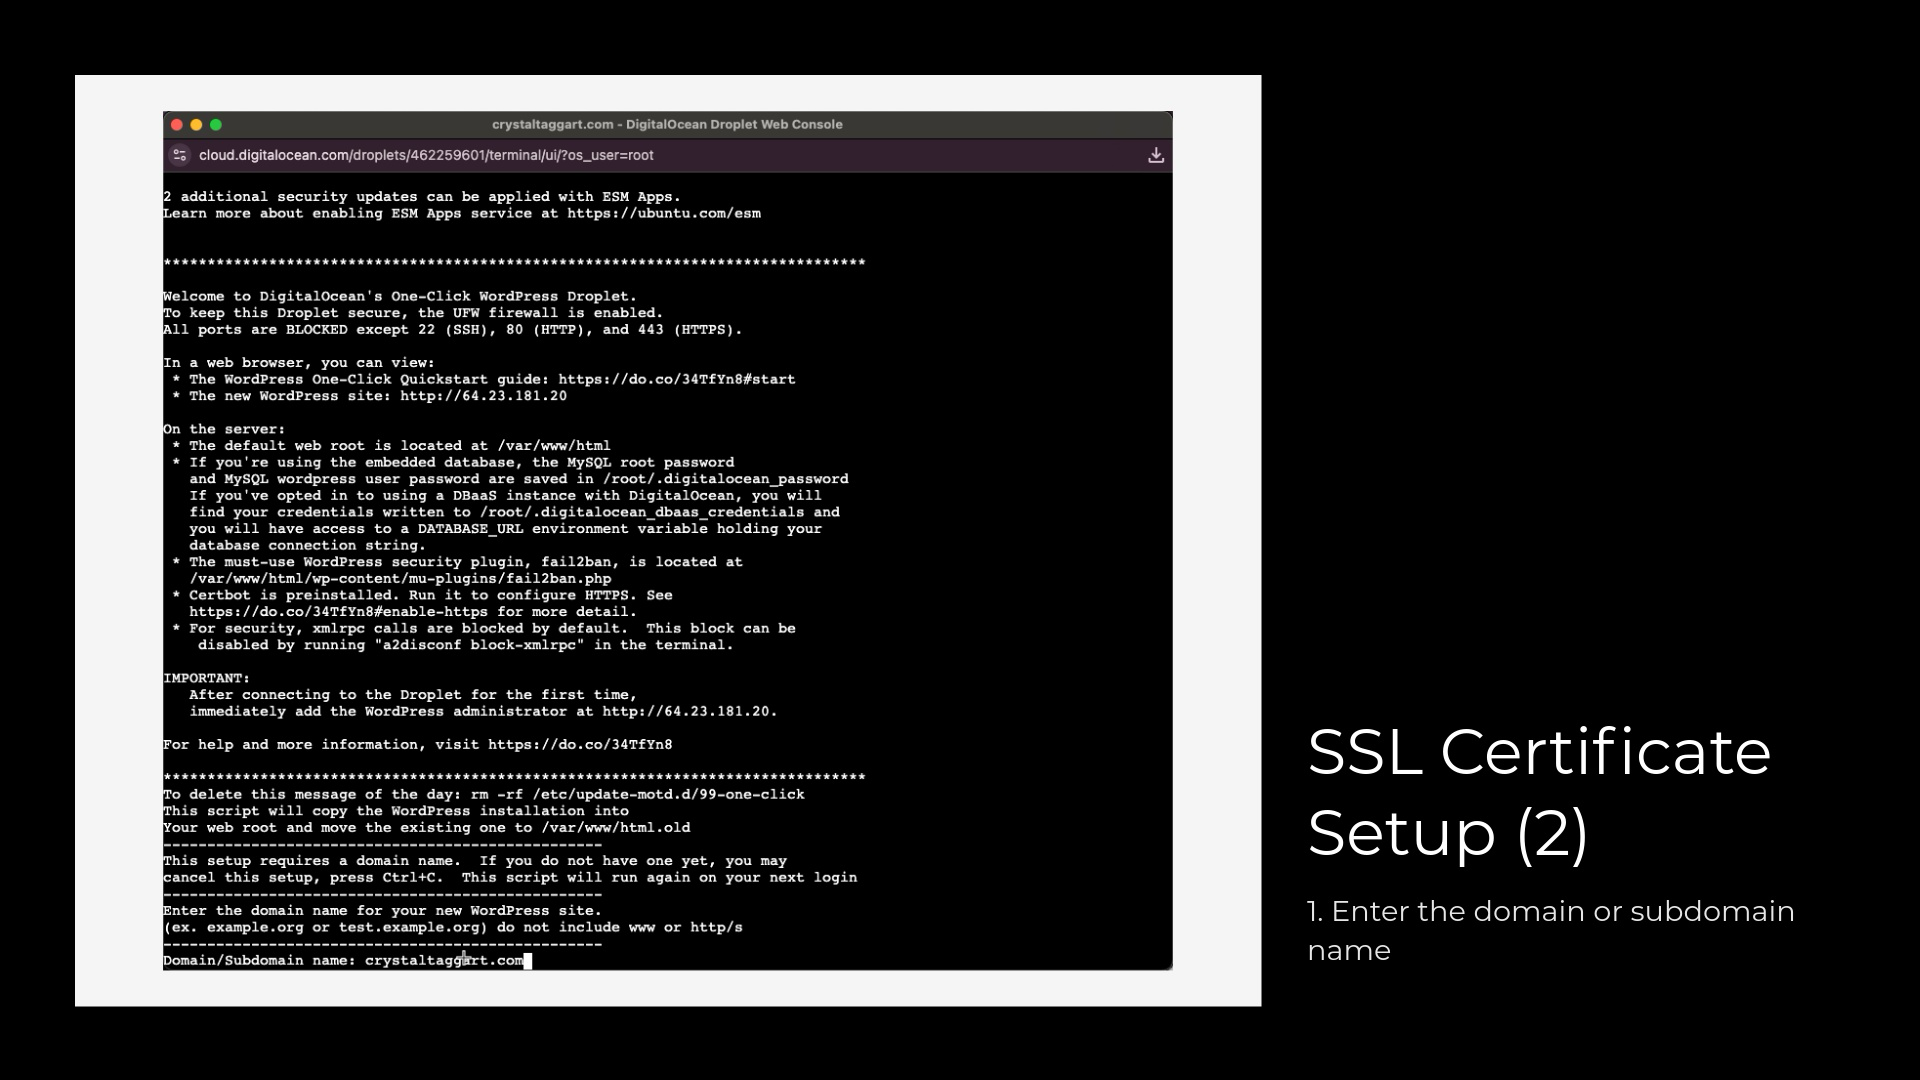
- SSH into your Droplet by clicking Lauch Droplet Console in Digital Ocean. The domain must resolve prior to this step which may take a few minutes but may take up to 24-48 hours.
- Enter the domain or subdomain.
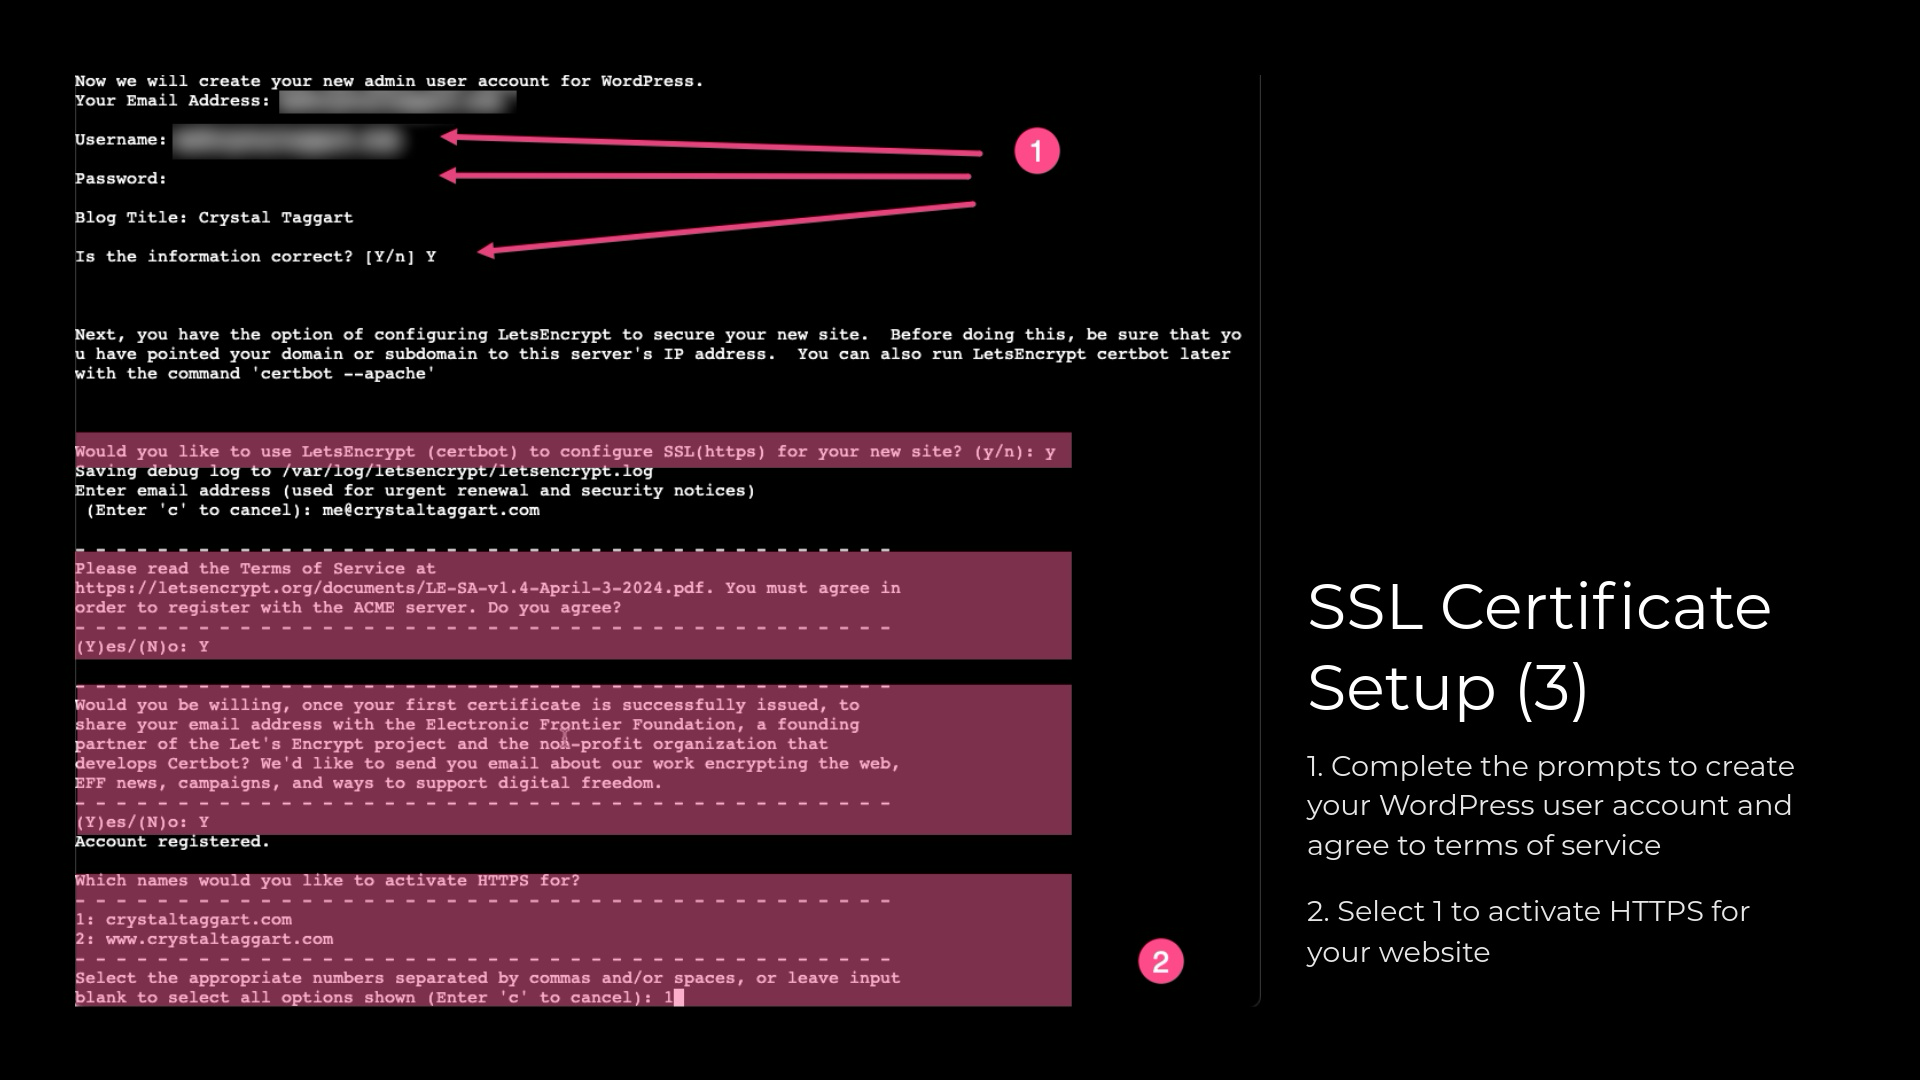
- Complete the prompts to create your WordPress user account and agree to terms.
- Select option 1 to activate HTTPS for your website.
- Navigate to your url and go to https://yourdomain.com/wp-admin and login using the user account created in step 4.3.